
What you are going to learn in this tutorial
- Create a diagram structure from scratch
- Use the draw.io shape search
- Efficient formatting of shapes
Introduction
Now that you’ve learned how to insert and modify shapes, add text and use connectors, it’s time to put it all together. In this exercise you’ll learn some more advanced formatting options by using the shape search on the left and the format panel on the right hand side.

Tutorial
Add shapes, text and connectors for shapes
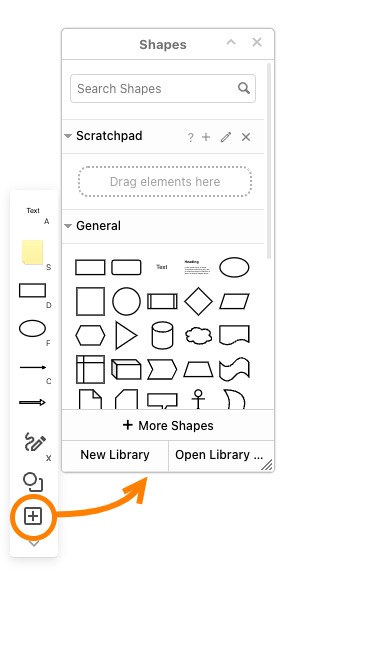
Create the tree diagram example from above in a new, blank draw.io diagram. Use the Rounded Rectangle shape from the General library, then search for the term Display, using the shape search in the upper section of the library panel.
Diagram editor tip: You can see additional shapes by clicking on + More shapes at the bottom of the symbol library.
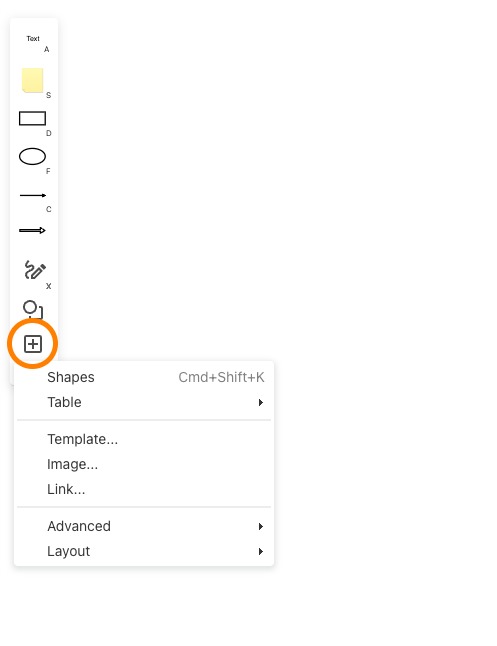
Board editor: Clicking on the plus symbol in a box (shown by the orange circle) displays a submenu, and selecting Shapes opens up the shape panel and search box.
Duplicate the Display shape four times and position them roughly one below the other. Now use the Align and Distribute functions from the Format Panel to first center the shapes vertically and then align them at the same distance. Then select all four shapes, duplicate the set, choose Distribute > Horizontal to mirror the set and position it on the opposite side. Add the text and connectors.
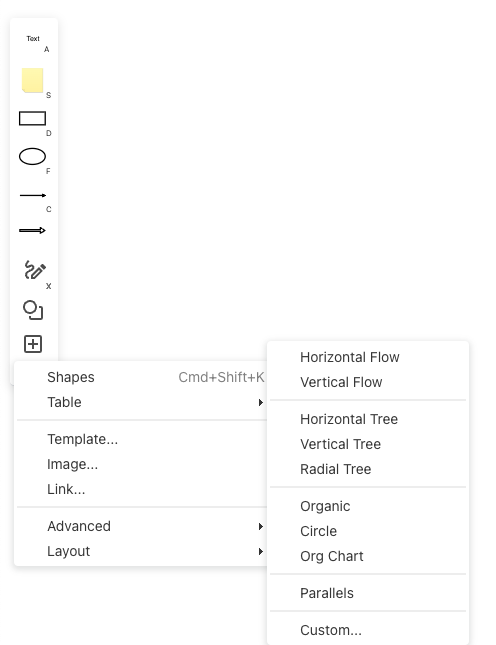
Board editor: Clicking on the plus symbol in a box brings up the submenu; choose Layout > Horizontal Flow.
Add text and connectors
Click on a shape and start typing to enter text. Text size, font, and color can be adjusted in the Text tab of the format panel, in addition to the position of the text.
Double-click on a text to access the enhanced text options (they will overlay the format panel). This way, you can add numbering or bullet points to your text or set multiple links in your text, if needed.
Click and drag a connector from a connection point to another object’s connection point – it must be in a green circle to properly link the two shapes. Your connector won’t move from these connection points once you have created it – which is very useful for this tutorial example.

Format shapes, text and connectors
First we are going to change the shape styles. Perform the following changes, using the Style tab of the Format panel.
- Set Gradient for the shapes Tree Species, Conifers, Deciduous Trees
- Set a single color for all other shapes
- Choose a dashed line for the lower six shapes
- Set Linewidth to 2pt

Now adjust the text of the diagram. The lower shapes already have the default font size of 12 pt, so you only have to set the font size of the heading to 24pt. Also make the text bold.
Adjust the style of a connector by selecting it, then using the Style tab in the Format panel.
- Set Rounded lines
- Change the colors
- Change Linewidth (2/3pt)
- Edit the The Line start and Line end of the arrows

Additional resources
Tutorial exercise 6: Working with the shape libraries to create a flowchart
Last Updated on November 23, 2022 by Admin