
Diagrams are powerful – they make text easier to understand, and you are more likely to remember information when it’s presented in a diagram. Plus, they make your documents and presentations look much more professional.
Companies are increasingly switching to G Suite and individuals are taking advantage of Google’s free cloud-based office software and file storage platform.
With the free draw.io add-ons for Google Docs, you can easily add your draw.io diagrams as images to your documents and presentations, without having to export an image from draw.io and paste it into your document manually each time you change your diagram. Now, whenever your diagrams are updated, you can refresh them in your document and it will automatically regenerate the diagram image with the updated diagram. This works really well when you store your diagrams in Google Drive!
Install the draw.io add-on
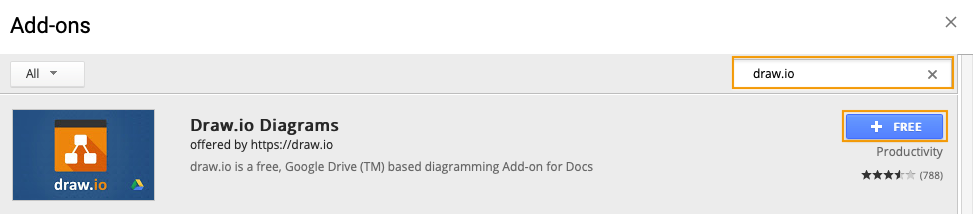
1. First, open or create a new document. In the menu, click Add-ons then Get add-ons.

2. Search for draw.io, then click on the + Free button. Google may ask you to log into your account.
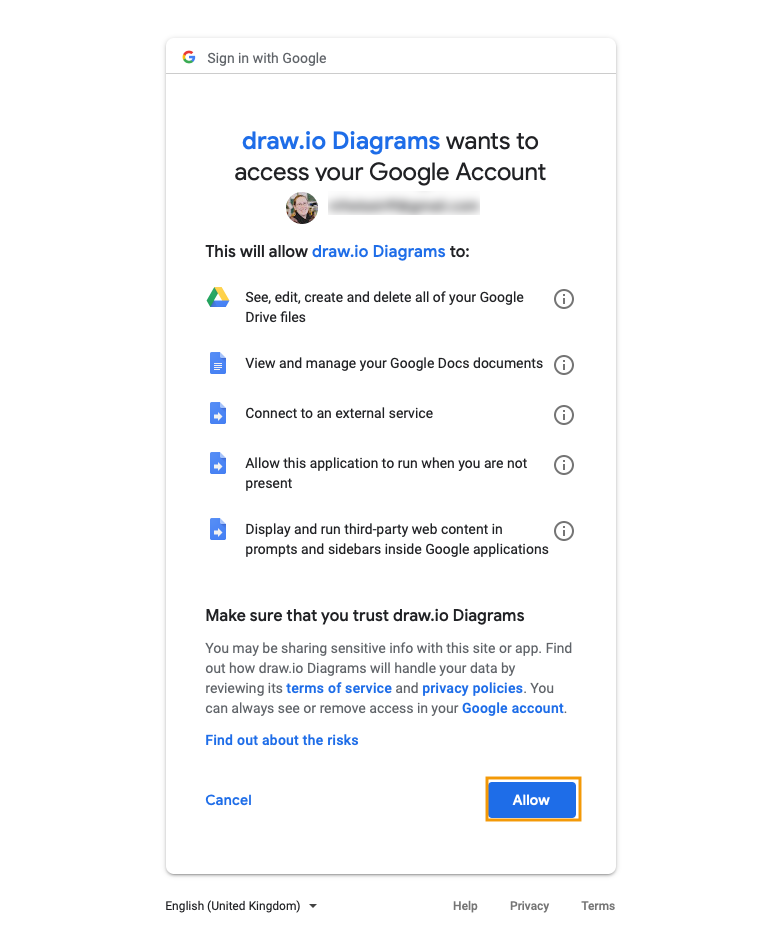
3. Finally, click on Allow to give the draw.io add-on permission to access your Google Account so it can see your files and import diagrams.
You’ll now be able to insert your draw.io diagrams into your documents.
Your diagram data is private and secure when you use the draw.io add-on in Google’s software. If you save your diagrams to Google Drive, all data, including the diagram file and your documents stay within your Google account.
Insert a diagram into a Google Doc
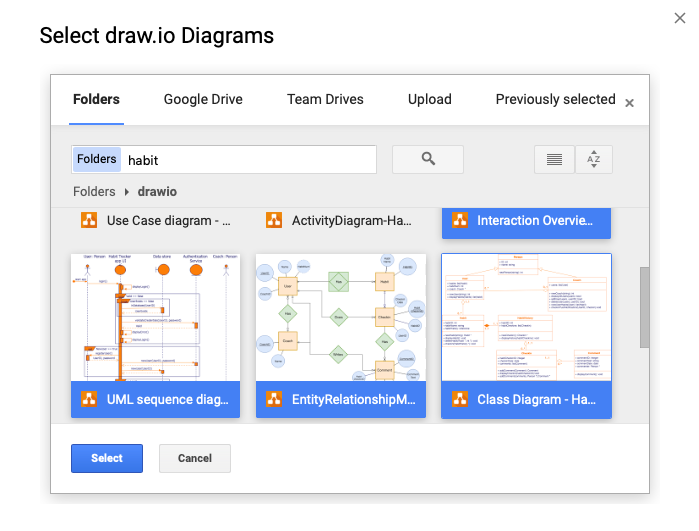
- Select Add-ons > Draw.io Diagrams > Insert Diagrams from the menu.
- Navigate to where your diagram is stored, click on it, then click Select.
- Set the display options for your diagram within your document:
- Choose which Page of your diagram to insert into your document if your diagram has multiple pages. You can only add one diagram page each time you insert a diagram.
- If you want to include a high quality image (better for print, but this may slow Google Docs down), select the High Resolution checkbox.
- Click Insert and your diagram will be added to the page.
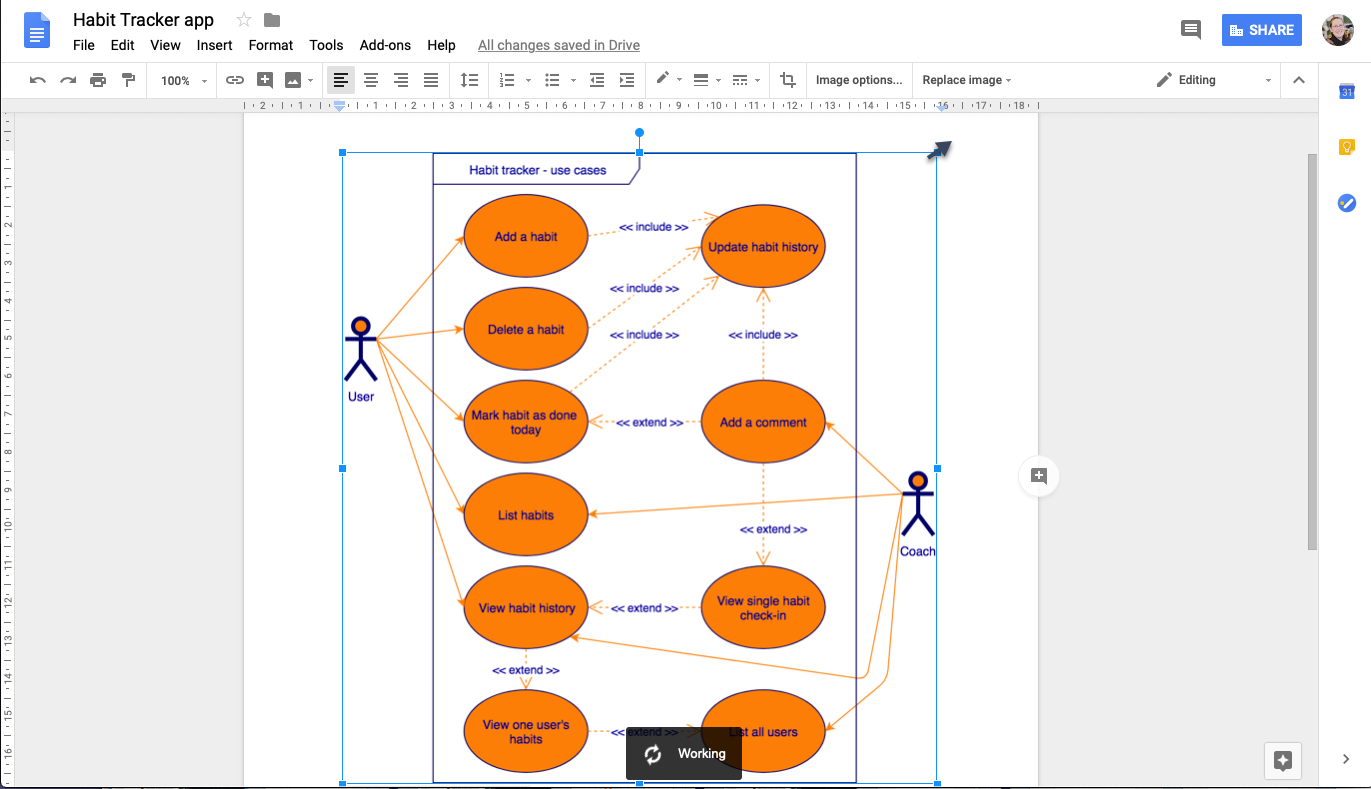
Your diagram will automatically fill the width of the page. When you select it, you can drag the corners to resize it, and drag the middle to move it to another position on the page.

Insert multiple diagrams in one step
While you can only insert one page from any single diagram into your document each time, you can select multiple diagrams to insert at once. Each of these diagrams will be automatically resized to fill the width of the page.

Work with your diagrams
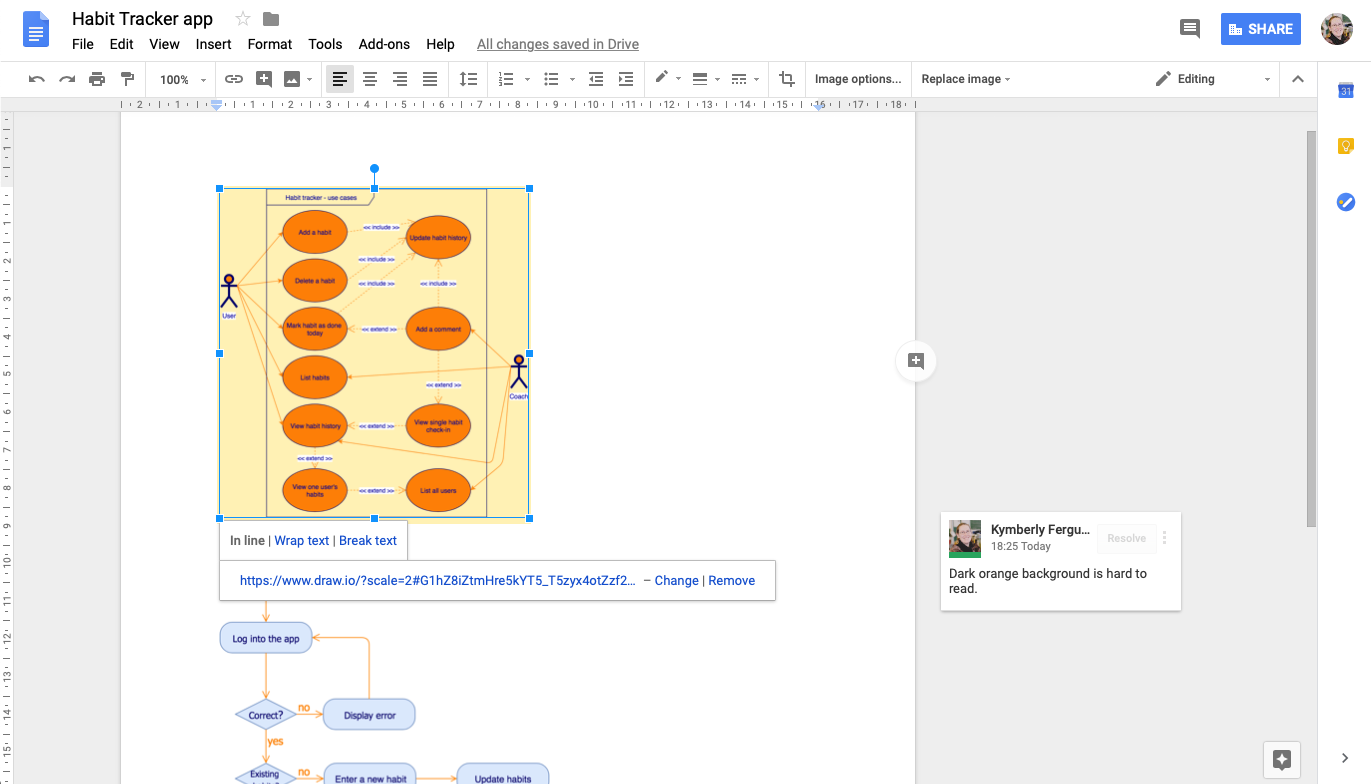
When you select your diagram in your Google document, you’ll see it was automatically linked to the draw.io diagram file.
Click on this link (usually displayed below your diagram) to open it in the draw.io editor in a new browser tab.
Be careful: Don’t remove that link or you will no longer be able to open it in draw.io from within your document or update it via the add-on menu options!

Comment on diagrams
One of the best things about Google Docs is how easy it is to collaborate with others on the one document. You can comment on the diagram in exactly the same way as commenting on text or on an image.
Select the diagram then click the Add a comment bubble on the right, or right-click and select Comment from the context menu.
Update your diagram to see changes
When you have changed something in your diagram in the draw.io editor, you’ll need to regenerate the placeholder image of it in your document.
Select Add-ons > Draw.io Diagrams > Update Selected from the menu. After a short time, the diagram in your document will be updated with the changes you made in draw.io.
Tip: If more than one diagram has been changed, choose Update All instead.

Change how your diagram appears
There are a few editing options that you can use to change how your diagram appears in your document, without having to open it in the draw.io editor – this will not change your diagram itself.
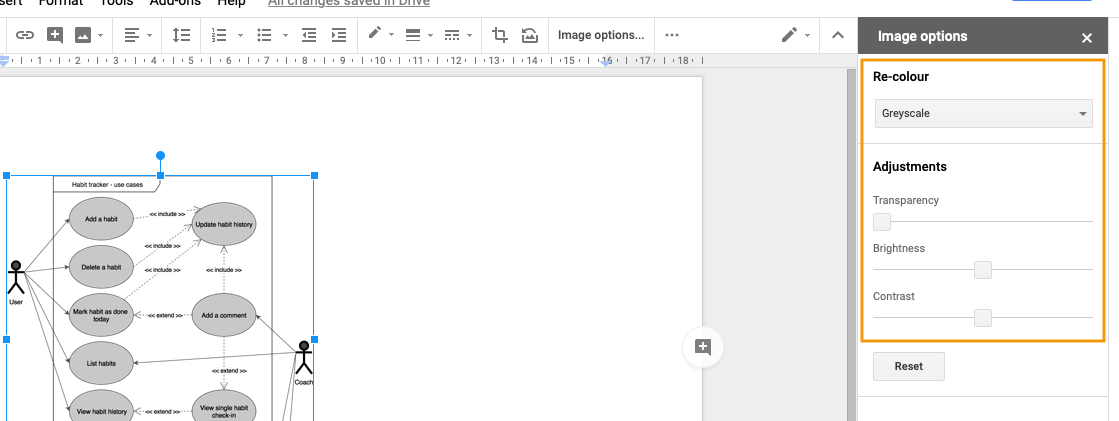
Image options
You can recolor the diagram, change its transparency, brightness or contrast within your document without changing the diagram itself by setting different image options.
Select the diagram in your document, then click Image Options in the toolbar, or right click and select Image Options from the context menu. The settings that you can change will appear in a panel on the right.
For example, you can quickly change a diagram to greyscale to make your document (and diagrams) easier and cheaper to print. Your original draw.io diagram will not be changed.
Crop your diagram
Perhaps you only need to show a part of a diagram, but don’t want to create a separate draw.io page just for that diagram section.
Double click on the diagram in your document and you will see a thick and black outline appear. Alternatively, select the diagram then click Crop image in the toolbar.
Drag this outline to include just the section of the diagram you want to display. You can drag the diagram ‘under’ the crop selector to display a different part of the diagram – it doesn’t just have to show the top left!


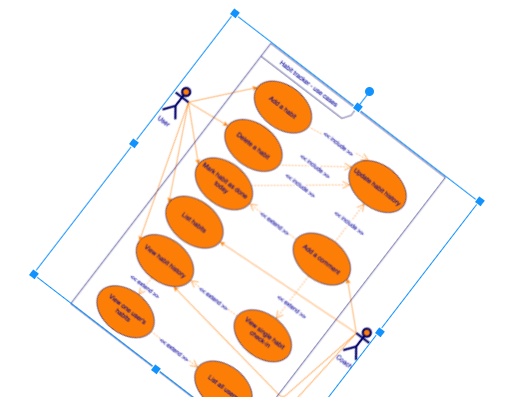
Rotate your diagram
When you select a diagram, you’ll see an extra round circle hanging off the top. Click and drag this left or right to rotate the diagram in your document. This only changes what you see in your document – your original draw.io diagram will not be modified.
Just started diagramming?
Our self-directed training course and video tutorials will help you get started if you are new to diagramming.
If you are documenting your Google Cloud architecture in a Google document, you can now include these diagrams – draw.io supports the full range of Google Cloud Platform icons and templates.
Last Updated on April 9, 2020 by Admin