
You wouldn’t just start coding your mobile app without creating a few mockups of the user interface first. And draw.io makes this easy!
But should I create a mockup as soon as I have an app idea?
No! First, you’ll want to start with outline the tasks that users will perform within your app. You may find the following diagrams helpful at this stage:
- Use case diagrams
- Activity diagram or workflow
Once you know what steps your users will take, you’ll know what interface elements you will need. Then come the mockups and other diagrams that will help you program your app.
Enable the shape libraries for your mockups
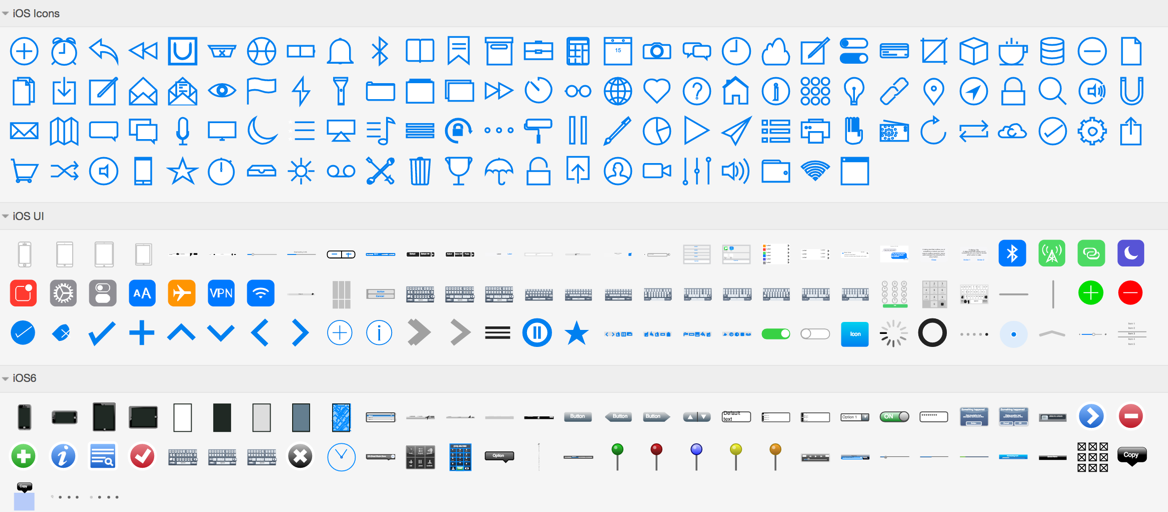
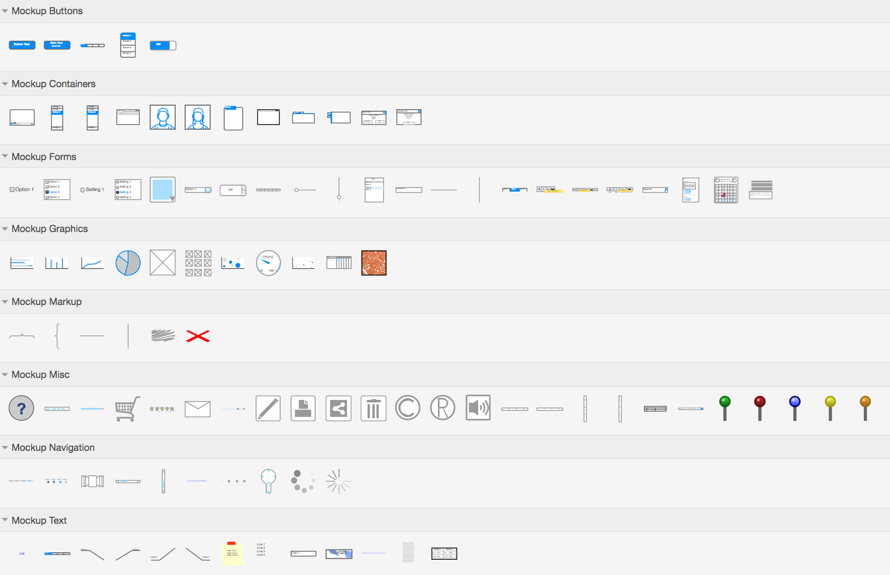
There are many shape libraries for mobile app interfaces that will make creating an app prototype a breeze – both for iOS (Apple) devices and apps, and for general mockups.
Enable the mockup and prototype libraries by clicking on More shapes… at the bottom of the left hand panel, scroll down in the Shapes dialog, and make sure the iOS and Mockups shape libraries are enabled, then click Apply.
You can see the current set of iOS and Mockup shapes in the images below.
Of course, you can use any other shape or clip art that is in any of the other draw.io shape libraries, or create your own custom library for your mockups with your own shapes, collections of shapes and images.
Build your mockup
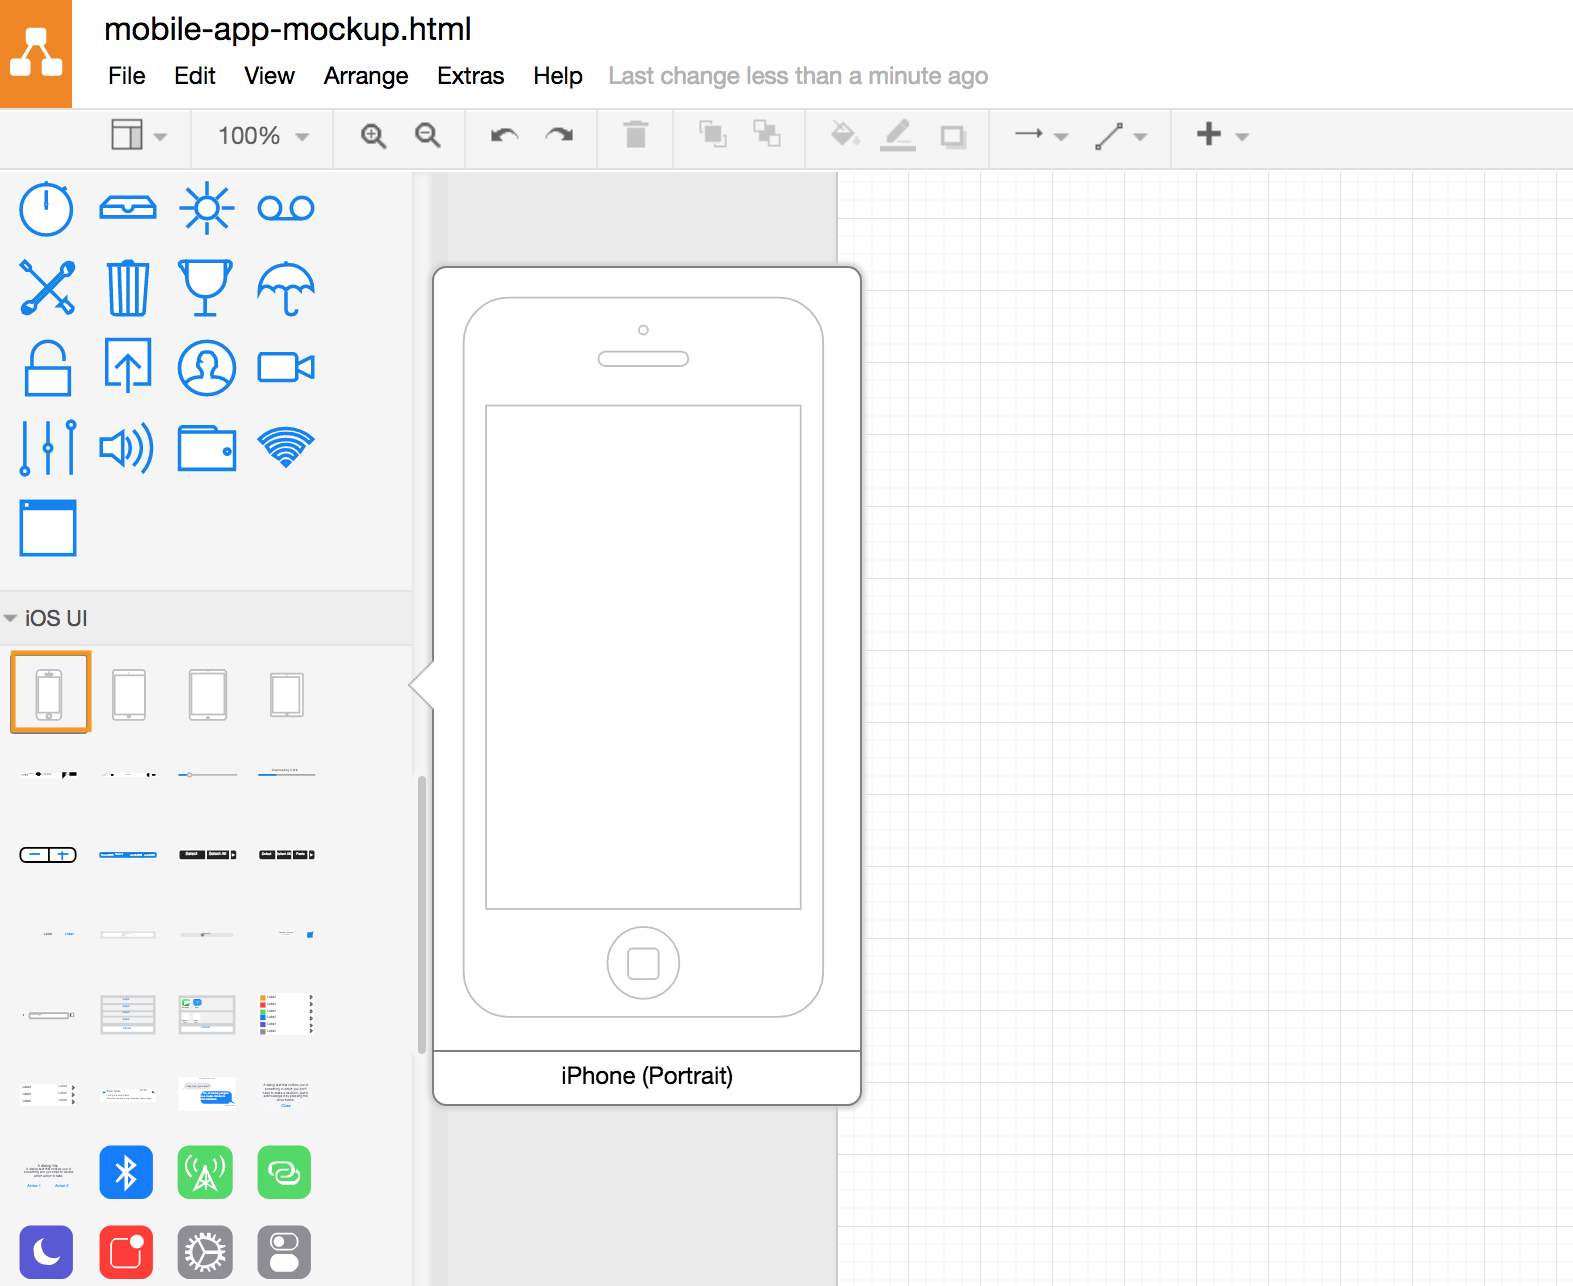
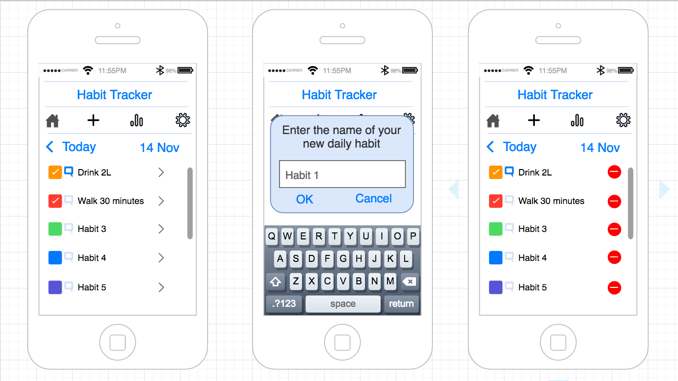
It’s always easier to imagine what your interface will look like when you build it within an outline of the device. In our example, we’ll use an iPhone. From the iOS UI shape library, insert the iPhone outline.
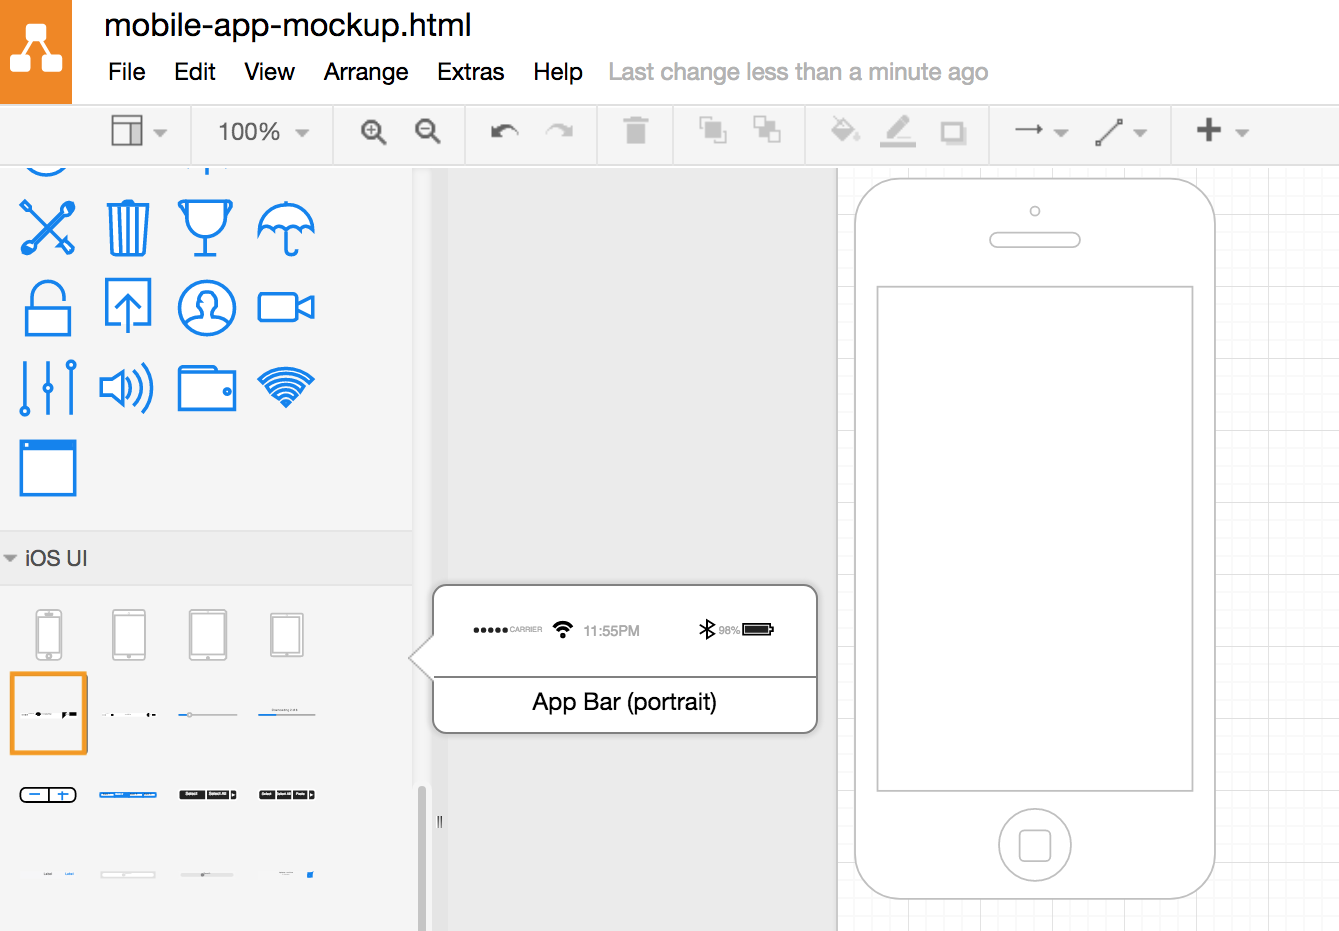
Then, start adding components. You can see the various steps I took in adding components in the images below.
- First, I added the standard app bar in portrait mode – this is a collection of shapes for the icons displayed at the top of iPhones.
- Then I added a few dividing lines and name of the app.
- The app menu came next, along with another dividing line (copy and paste was my friend!)
- Then I wanted to add a list with different checkboxes to represent the different habits.

I kept going until I had finished one screen, then copied the common components to a ‘new’ screen/device, and worked on the next task that users would need to complete in the app.
It’s really fast to build up your mockup using these pre-grouped collections of shapes!
Tip: If you need to position components more precisely, when the components are selected, use the arrow keys on the keyboard instead of the mouse.
Of course, your app will rarely be just one screen, so you will need to insert or copy the device outline and the standard components multiple times. Hold down Cmd or Ctrl and click on all of the components you want to duplicate, then click Edit > Copy (or use the keyboard shortcut Cmd + C or Ctrl + C).
Tips for creating good app mockups
Keep it simple: Too much clutter makes mobile apps hard to use. Keep the UI simple and make the visual clues as easy to understand as possible. Apps that are intuitive to use are used much more regularly! Plan the tasks that the users will complete with your app before you start designing – it’s easier to create a simple UI when you have clear goals.
Keep it consistent: Don’t move UI components around, keep everything consistent – including icons, dialog components, labels, and their positions.
Keep it up-to-date: Use UI components that are recommended for the most recent device. A UI that was designed for when the iPhone 5 was new looks outdated and tired on an iPhone 7. You should use iOS components for your iOS apps, and Android components for apps on Android devices, otherwise your users will not feel comfortable using your app.
Keep it lightweight: Don’t try to use large images or video components that will slow your app down. Also, don’t try to design your app like a website – they aren’t meant to be navigated and used on a small screen with large fingers! Don’t make buttons or components too small – make sure it’s all easily readable and can be used with appropriate finger gestures.
Keep it flexible: These days, users expect to use apps on multiple devices – it needs to work on screens of different sizes, and both portrait and landscape modes. Take advantage of the various device outlines in the draw.io shape libraries to plan the different layouts for your app. If you are developing an iOS app, consider split view and slide over. Also consider how much of the app will be covered up by keyboards of various sizes.
My app mockup is done! What’s next?
First, get feedback on your design – see what your target users think about it. Do they feel it will be easy to use? Does it all make sense?
Once you are ready to start programming, there are a few more diagrams that you can create with draw.io that will help minimize errors and time spent debugging.
- Entity relationship diagrams
- Event or sequence diagrams
- UML diagrams
Additional resources for developing iOS and Android apps
Track your app development and diagrams easily
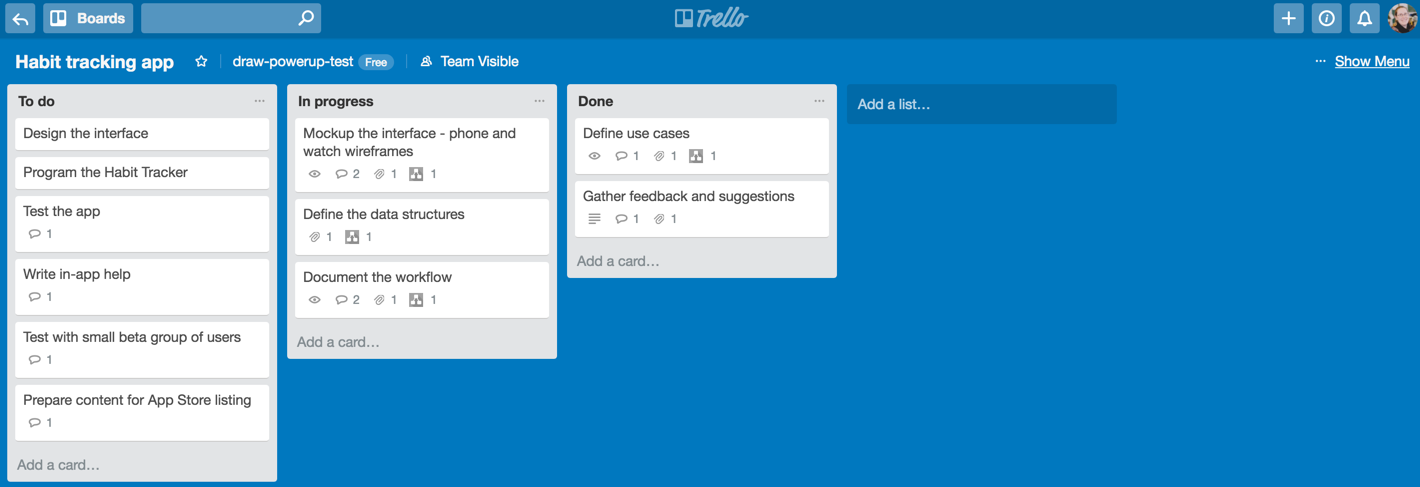
Because there are many steps in developing an app, it’s best to track your app development using something like a Trello board. draw.io is integrated into Trello, so it’s easy to create and share diagrams, especially if you are working with a distributed team.
Design resources and tips
Last Updated on April 17, 2020 by Admin