If you’ve used draw.io at all (and even if you haven’t) chances are you’ve made a flowchart or two in your life. They’re one of the most common use cases for draw.io. They’re ideal for visualizing the individual steps of a complete process. And when that process involves multiple teams or other entities, it becomes necessary to divide your chart into lanes representing each of those entities. We call them swimlanes. And here’s what you need to know about the ease of working with swimlanes in draw.io.
When to use swimlanes
It’s actually not very often that a flowchart process is limited to just one person or one team. This is why we use cross-functional flowcharts and swimlane diagrams to show the flow of data or activity relationships between multiple groups.
The act of separating the steps in a process visually identifies the parties responsible for each step. It makes the information easier to understand. And the result is decreased confusion between teams.
Specific examples of use cases that make use of swimlanes and cross-functional flowcharts include UML activity diagrams, interaction diagrams, sequence diagrams, use case diagrams, data flows, and more.
We cover the overall mechanics of swimlanes as well as some useful pro tips here. But for a look at a specific use case, take a look at our post: Using draw.io for BPMN Diagrams.
Getting started
When you imbed a draw.io diagram in Confluence, the easiest way to open a swimlane template is to select it from the initial splash screen:
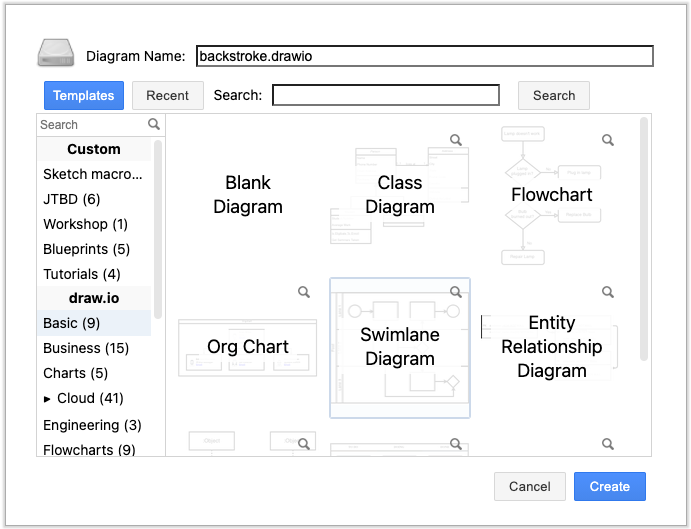
Alternatively, once the draw.io canvas is opened, use the shape search at the upper left of the shape panel and search for the term pool, or choose one of the pool objects from our Advanced shape library.

You’ll end up with something like this:

Why swimlanes?
You may ask yourself, “Where’s the advantage of using pools and swimlane shapes when you can also build the pool from standard rectangular shapes?”
Aside from the convenience of simply choosing a ready-made template, there’s another important advantage to this approach. When you use one of the pool shapes, each swimlane acts as a container. This means every shape added to a particular swimlane remains connected to it.
Adding shapes to the container is easy. Simply drag and drop objects from the shape panel onto the specific swimlane. Once the swimlane gets a purple highlight, release the mouse button.
If you reposition a swimlane, the shapes associated with that swimlane move with it. No additional action needed on your part.
Expanding and collapsing lanes
You don’t have to worry if you’ve got too many swimlanes to fit comfortably on your screen.
Take a look at the Plus or Minus signs in the header sections of each lane (and of the pool itself):
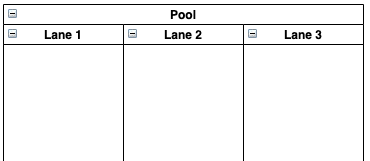
Click on the Minus to collapse a lane:
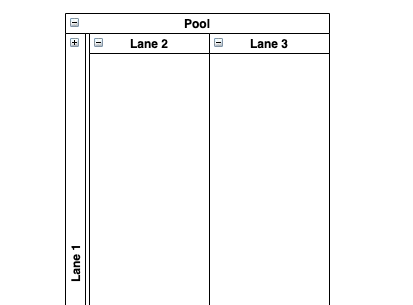
Click on the Plus to expand it again.
If you don’t need this option, and you want to keep things as uncluttered as possible, simply select Extras from the main menu and uncheck Collapse/Expand
Adding lanes
If your pool doesn’t have room for enough swimmers, adding lanes couldn’t be easier. Simply select the entire pool. Now go to the Arrange tab of the Format panel on the right-hand side. Then click the appropriate Table button at the bottom to add (or remove) lanes instantly:

Other ways to add lanes include selecting a lane and then clicking on the blue arrow on the right. If you are a friend of shortcuts, you can also add lanes using Alt+Shift+ any arrow key (Option+Shift for Mac).
Expanding lanes
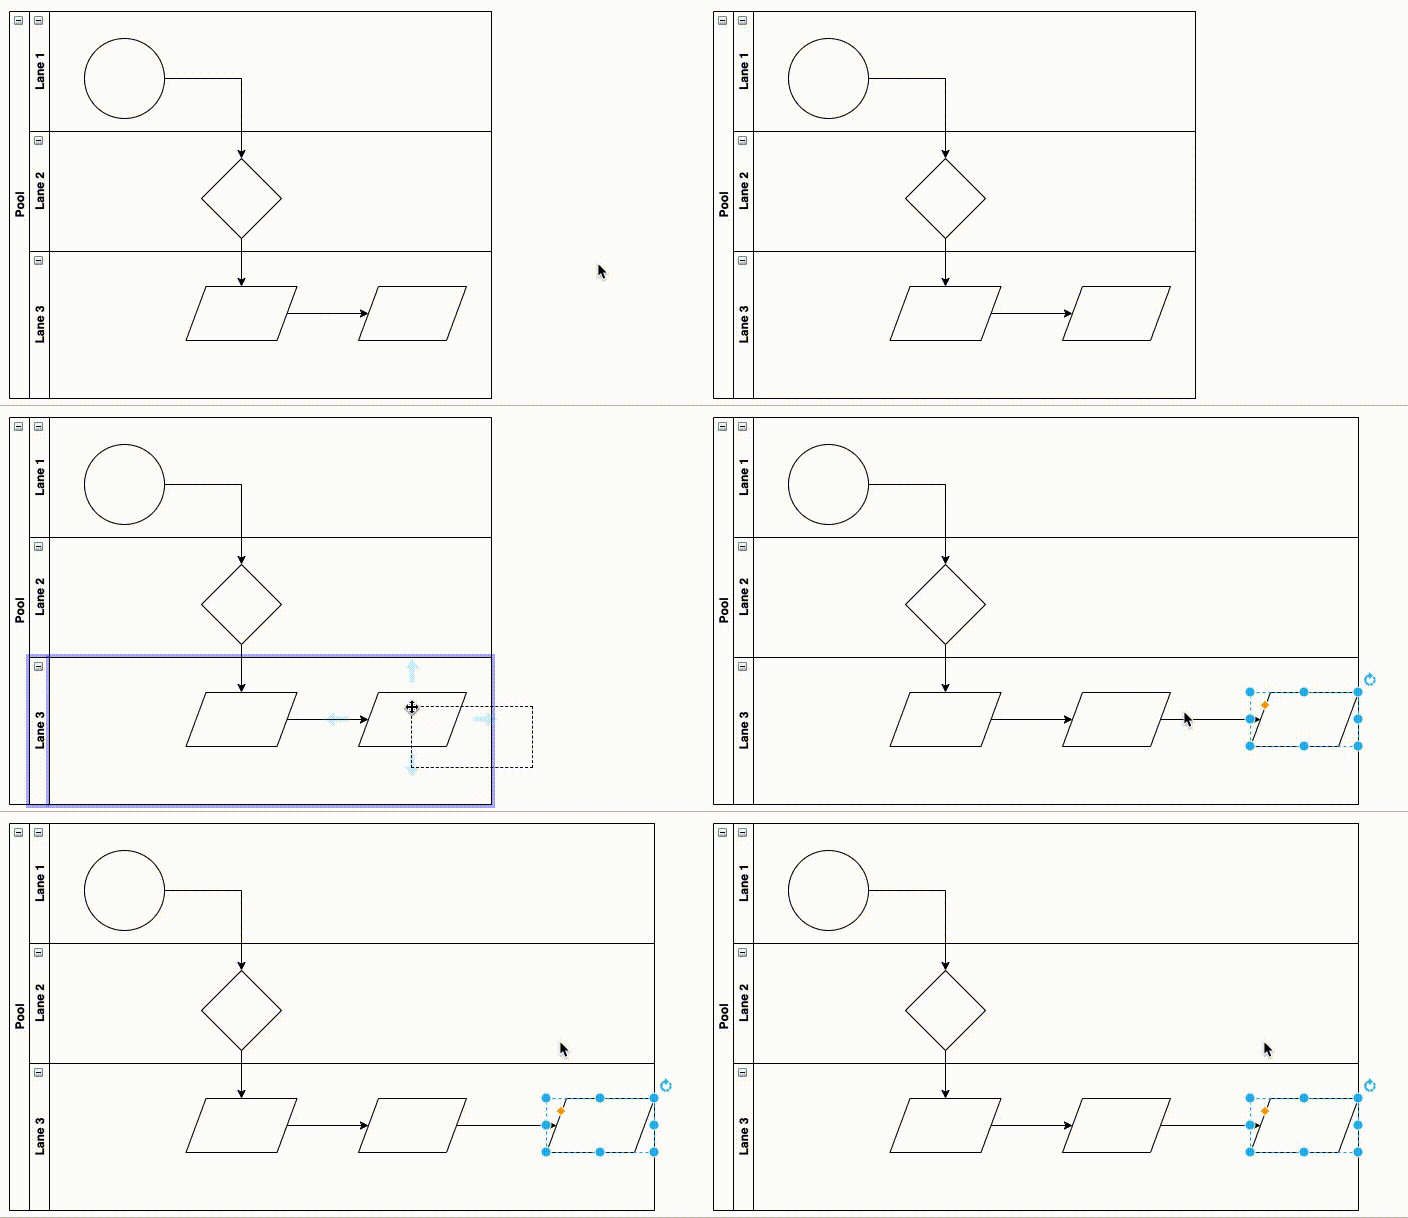
As you add shapes to a lane, you’re eventually most likely going to need some more room. You can expand/lengthen your lanes in two ways. First, you can simply click on the main pool header to select the entire pool. Next, click and drag to make your lanes longer.
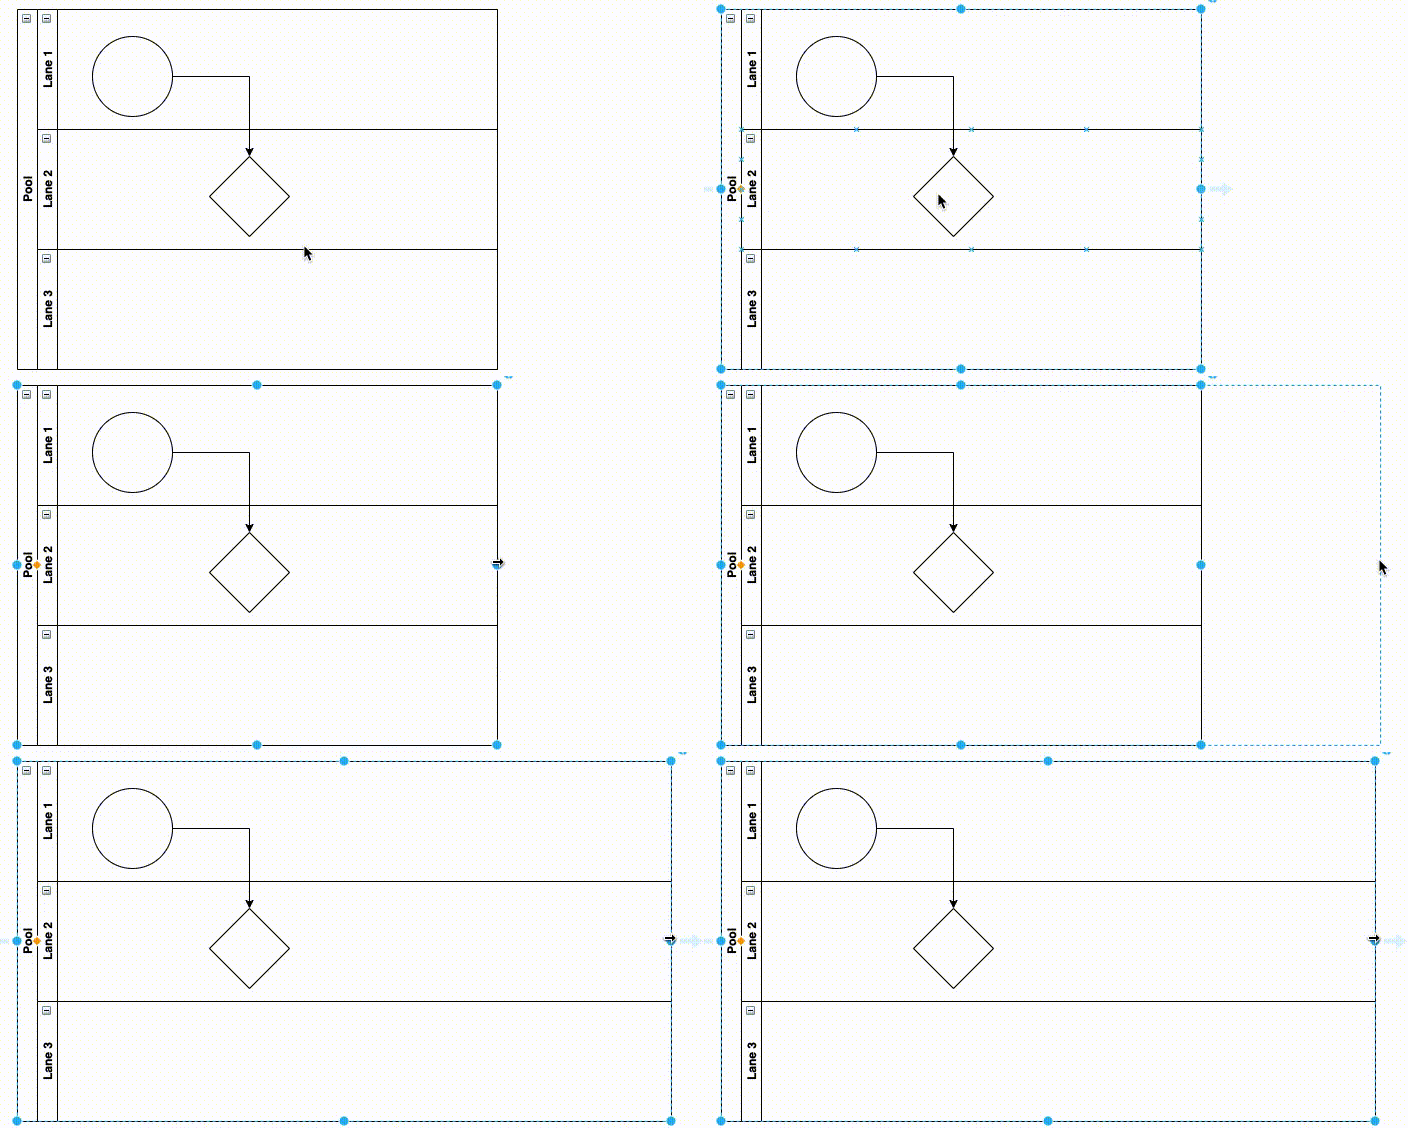
Another way to lengthen lanes is even simpler. When you drag shapes onto your swimlane, the lane is always highlighted purple. If you reach the end of your lane (doesn’t matter if this affects the height or width of the lane), it will automatically be extended once you release your mouse. This also works if you drag and drop new shapes on the connection arrows of existing objects to directly connect them.
Rearranging lanes
Sometimes, in the middle of diagramming, you may realize that one or more lanes need to move. There’s an easy solution for that as well. And when you do move a lane, all of its shapes and connections will move right along with it.
To rearrange your swimlanes, just left-click in the lane header and pull the lane slightly to the right. Now press and hold the Alt key (Option for Mac) while continuing to hold left click. Drag the lane to where it needs to be. And release the mouse button:
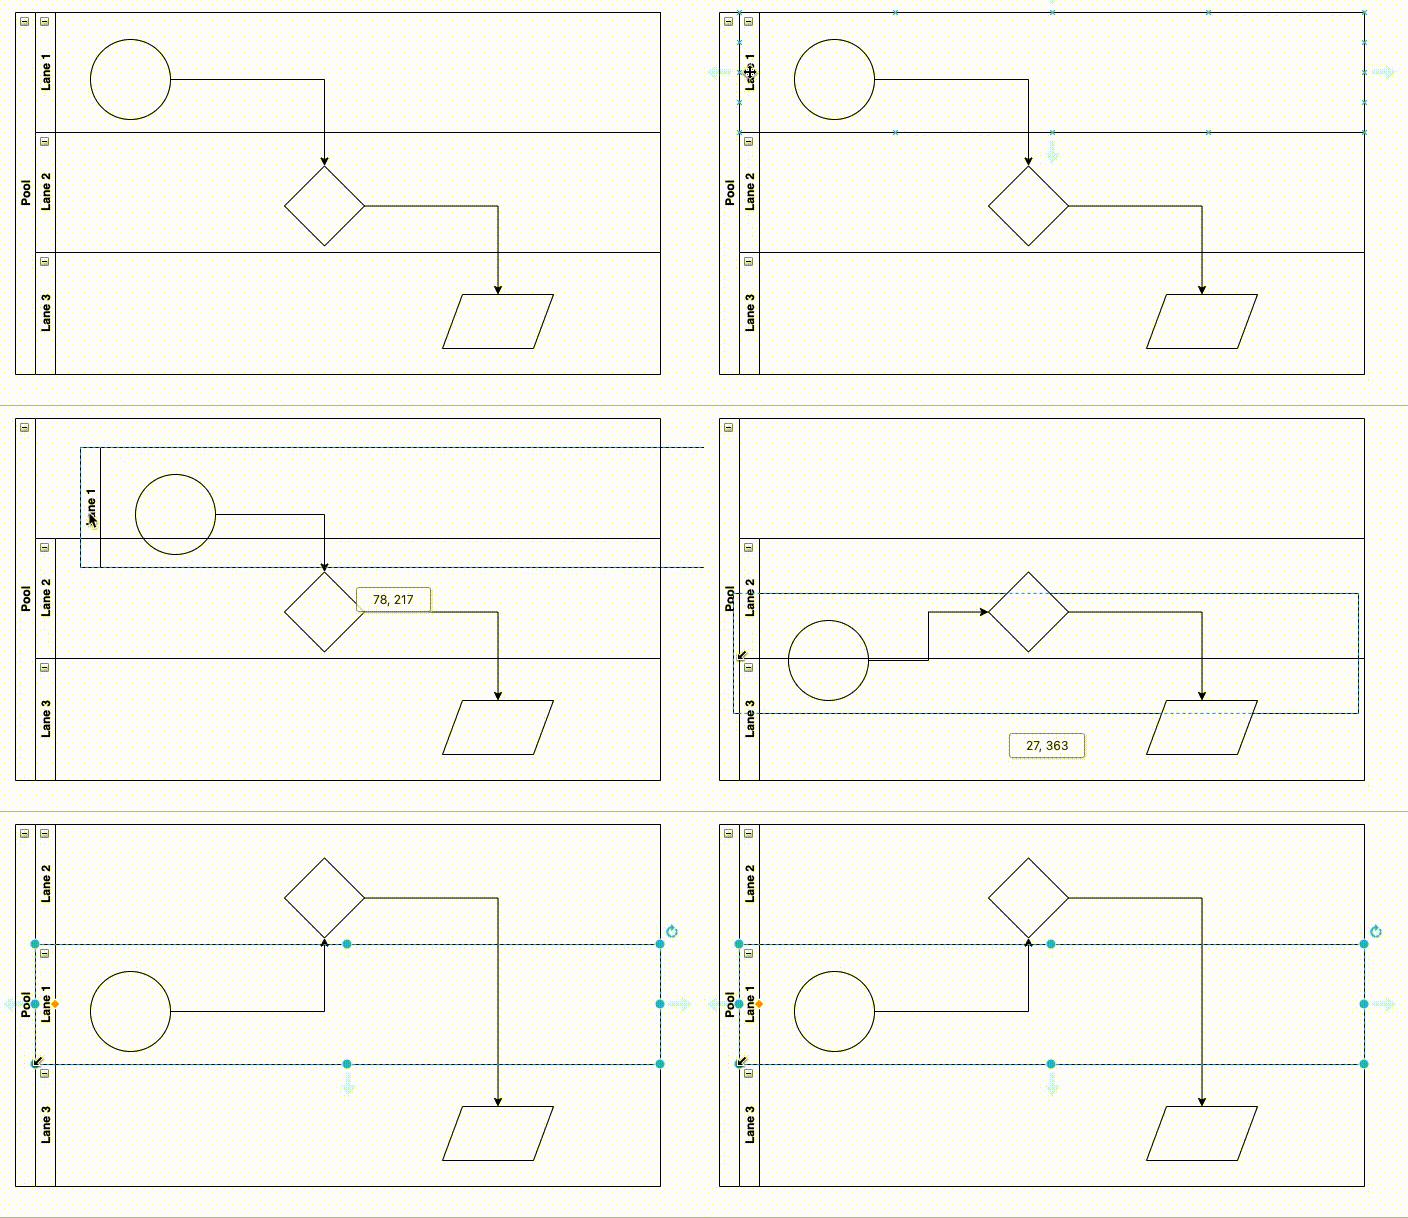
Diagram like a pro
With pro tips like these, you’ll be swimming in the deep end of the pool in no time.
Here’s a video to show you a little more about how it’s all done:
You are currently viewing a placeholder content from Youtube. To access the actual content, click the button below. Please note that doing so will share data with third-party providers.
More InformationAnd if you want to know more about draw.io in general, visit our YouTube Channel for a constantly updated playlist of how-to videos. Visit our one-stop tutorial shop to pick up all the ins and outs of draw.io diagramming. Or book a free demo to learn more about the limitless ways in which draw.io can make life easier and more productive for you and everyone in (and outside) your company!
Last Updated on October 18, 2022 by Admin

