
Starting a new job is a bit like stepping through a portal into a fantasy world. There are new rules to learn, new skills to master, and hidden knowledge to uncover. As an employer, you’ll want this journey to be a fun and magical adventure, not the dark and dangerous kind. That’s where your onboarding process comes in. A strong onboarding process improves engagement and productivity, reduces employee turnover, and creates a strong company culture that will attract future hires.
Creating a diagram of your onboarding process is an essential step that helps your team and your new employee understand the journey. Inspired by Harry Potter’s introduction to Hogwarts, we’ll be showing you how to design an onboarding process flow chart using draw.io—and we’ll even show you how to add some interactive magic. Hop aboard the draw.io express!
What is an onboarding flow chart?
Onboarding is the process that integrates a new employee into a company, and gives them the knowledge and skills they need to assume their responsibilities. An onboarding flow chart is a diagram that visualizes this process and the steps your new hire has to take. It clarifies what order things need to be done in, and by what specific date. For new hires it provides all the comfort of a chocolate frog, and for your team it creates clarity about their own role in the process.
Getting ready to create your flowchart
Before designing your diagram, you will obviously have to understand your onboarding process. While onboarding is a mystic art that could fill vast tomes of knowledge, here are a few things you will want to have on hand before you start:
- What is the timeline of your onboarding process? 90 days is fairly standard. What are the main phases you’ll look at? For instance, Day 1, Week 1-4, Month 2 and so on.
- What are all the tasks, documentation, responsibilities and skills your new hire will need to master during this period?
- What equipment/gear will your employee need to do their job?
- How will your employee be initiated into your company values and history? How will they feel welcomed?
Once you understand all the elements of your onboarding process, it’s time to conjure up your map.
Building an onboarding flowchart
An onboarding flow chart is generally designed with a vertical axis that represents the passage of time, and is divided into the phases of your onboarding timeline. When you open draw.io in Confluence you can choose to start with a blank canvas or use a template. There are several flowchart templates that you could use, but for our example we’ll build the diagram from scratch.
Setting up the structure
In the left-hand menu under Shapes, find the rectangle shape and drag it onto your canvas. Resize the shape to stretch across most of the canvas and then type in the title of your diagram. Next, drop a few rectangle shapes onto the left side of your canvas and line them up one on top of the next, with a bit of space in between. These will represent the different phases of your onboarding timeline, so label them appropriately. The first phase might be Offer Accepted, Future Employee, or Day 1, for instance. You can change the color and outline of the shapes from the style menu on the right. Finally, use the line shape to create dividers between each phase.
With this, you have a very simple structure for your diagram. While this is a quick and easy way to set things up, you will probably want to spend some time matching the design to your brand, and the needs of your particular chart.
As you design your diagram, you may want to think about creating something that can be reused for multiple employees. One way to do this is using layers. Click View > Layers, or type Ctrl/Cmd+Shft+L to open the layers window. The elements you’ve added up to this point will be in the background layer. You can lock that layer now and add a new layer which you’ll be working in for the next step. By creating a new layer for each employee onboarding process in your organization – for example, software engineers, marketing staff etc. you can keep all your charts in one place, and easily toggle through them.
Adding the steps
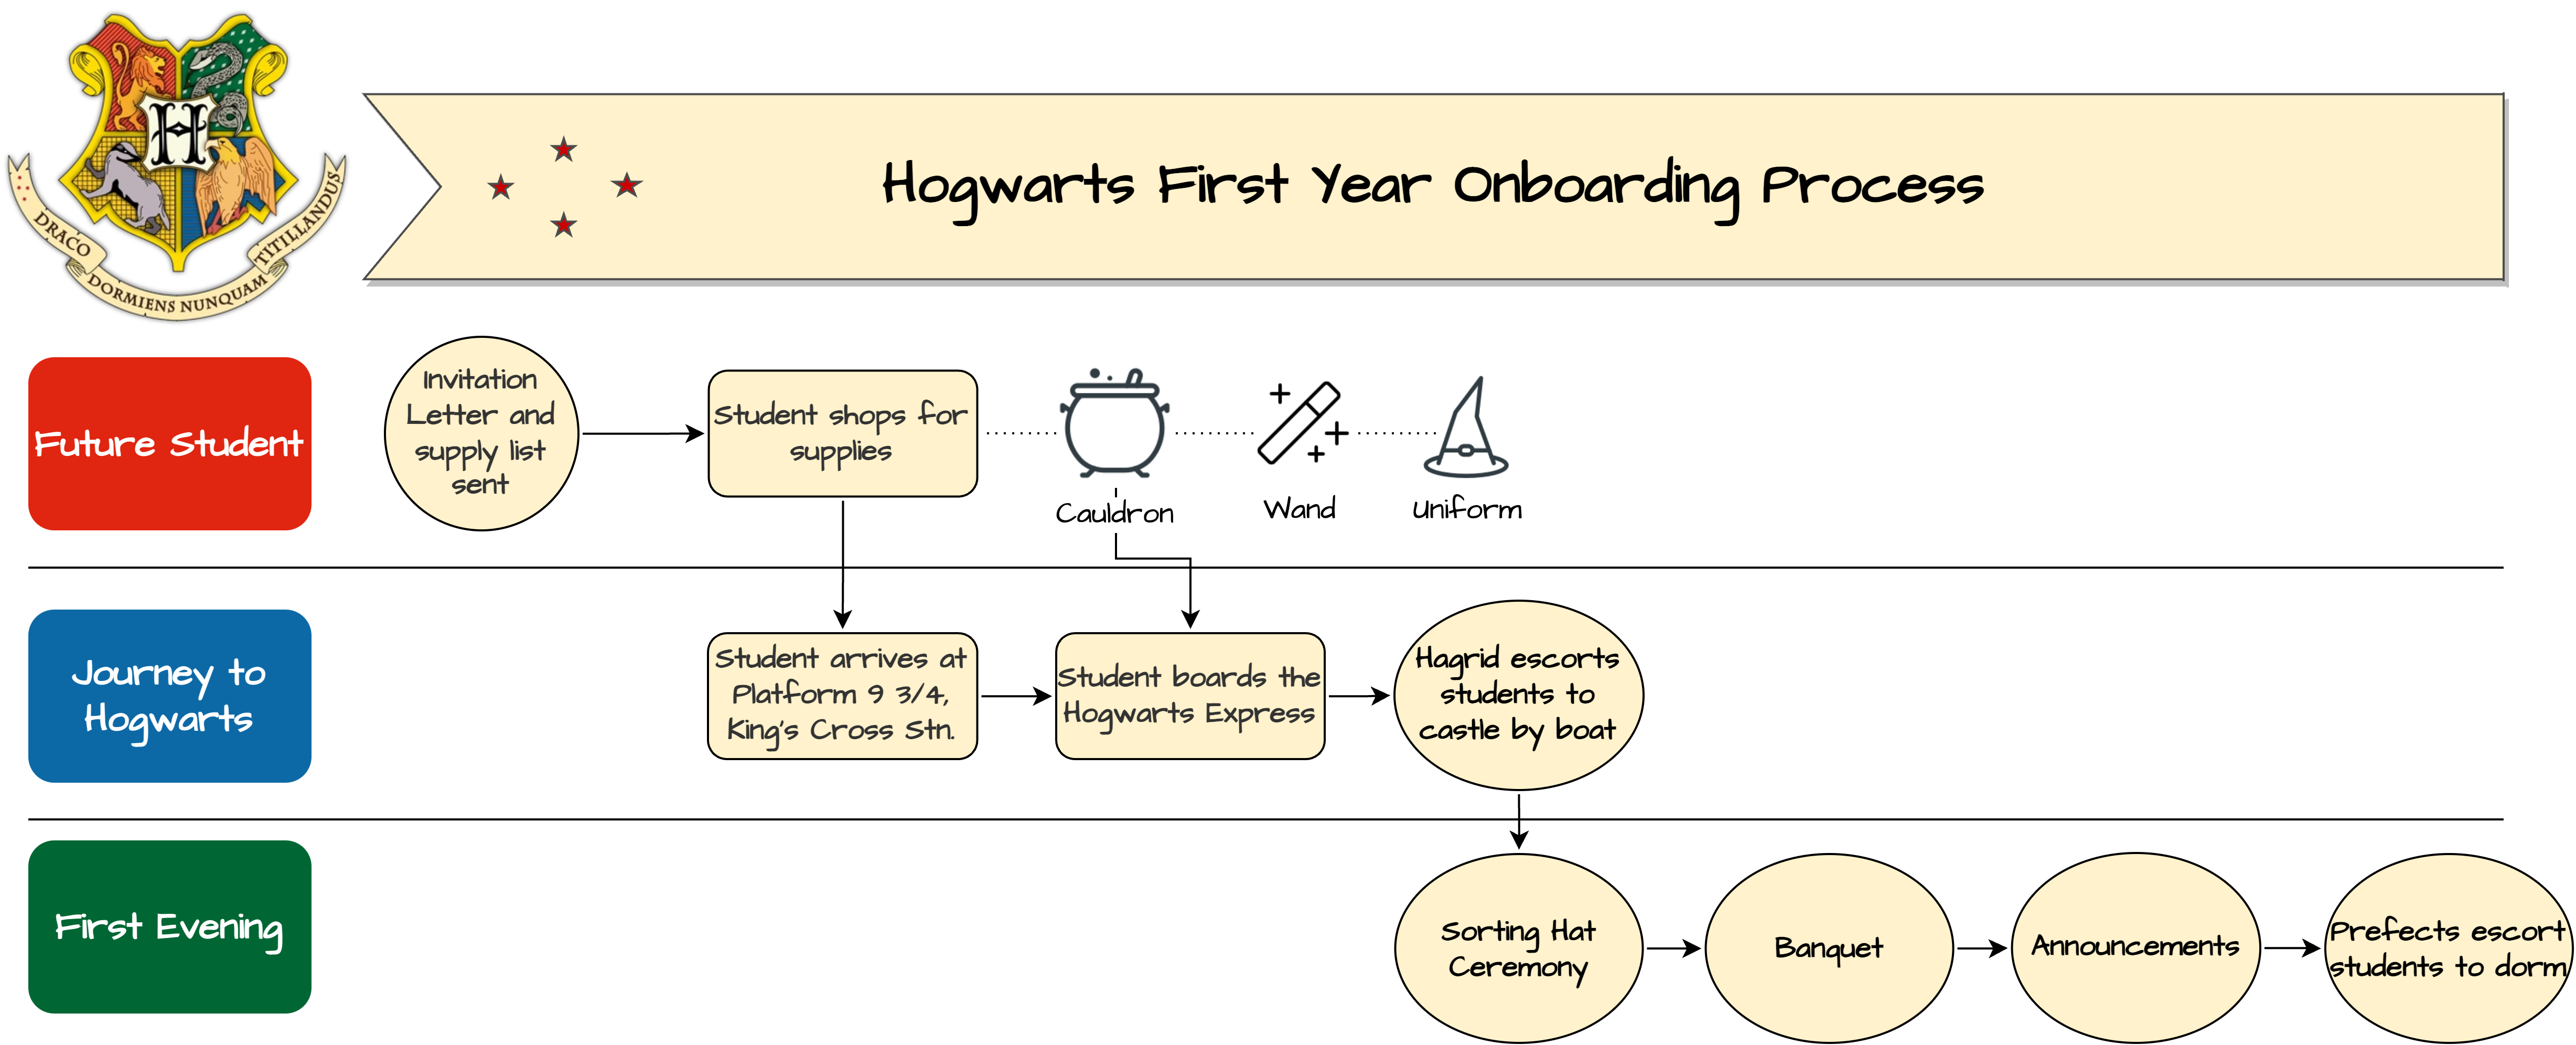
Once your structure is complete, its time to add the different tasks, documentation, equipment and everything else your employee will do in their onboarding. Most charts start with the moment your employee signs the offer letter—or in our case, when the young witch or wizard receives their letter of invitation to Hogwarts. Drag a shape onto the upper left corner of your chart. Double click and type to add a label, and then change the style from the right-hand menu. While you can simply drag each shape and connecting lines onto the canvas, draw.io also allows you to chain shapes together. Just hover your cursor over a shape, click on the blue arrows that appear and select the next shape in your chain. draw.io will automatically create the shape with a connecting arrow and link the two together.
Along with shapes, draw.io also has a huge library of icons that you can use in your diagram. If your employee gets a company laptop, why not add a computer icon? You can also drag-and-drop your own images onto the canvas, allowing you to match your diagram to your brand.
Adding interactivity to your chart
One advantage of using draw.io to build your diagram, is that it lives right in the space where your team works everyday. For an onboarding flow chart, it also means your diagram can be more than just a map of the —it can become a part of the process itself, by adding links to other pages within Confluence. Are there certain pages of documentation a new employee has to read? You can link to them directly in your chart. Simply right click on a shape, and click Edit link…. From here, add a link to the Confluence page or an external site, and when the employee clicks on the shape they will be taken to the linked page.
You can take interactivity even further if you like, by adding check boxes or buttons to your chart. With some creativity, you could create a progress bar that updates whenever they press a button, or even gamify your onboarding process by unlocking new steps in the chart as they complete tasks. The possibilities are endless.
You are currently viewing a placeholder content from Youtube. To access the actual content, click the button below. Please note that doing so will share data with third-party providers.
More InformationEnchant your next hire with an onboarding diagram built in draw.io
As your new hire explores the many mysteries and wonders of your organization, they’ll proceed with confidence thanks to their very own Marauder’s Map. By using draw.io, you can quickly build an onboarding flowchart that reflects your branding and is connected to Confluence. You can start your own diagraming journey today by trying draw.io for both Confluence and Jira. Just visit the Atlassian Marketplace to start your free 30-day evaluation. Already using draw.io? Check out our YouTube channel where we’ve put together a whole playlist with everything you need to know about flowchart in draw.io.
Happy diagramming!
Last Updated on March 23, 2023 by Admin